Check out our discord at https://discord.gg/3u69jMa
Writing Native Code
Note: Some C++ and UnrealScript knowledge is required.
Introduction
Native coding in the Unreal Engine refers to code that is written in C++ instead of UnrealScript. This C++ code can be called from a script to execute tasks that are either too slow in UnrealScript (about 20 times slower than C++) or are not possible at all due to the limited features of the language. Native coding is only officially supported by Unreal Tournament from 1999 since it is the only game that has its native header files publicly available for download. Epic never released the headers for newer versions of the engine due to licensing issues with third party code. However, after countless hours of work it was possible to modify the UT99 headers in such a way that they're usable with Republic Commando. This offers a lot of new opportunities to modders or people who just like to experiment with old games like me.
The way native coding works in Unreal is that you compile your scripts into a .u package and then when you write your C++ code you compile it as a dll with the same name as your package. When the game is loading an UnrealScript class and detects that it was declared as native, it also looks for a dll which contains the native code for this UnrealScript class.
Getting Started
Before you can write any C++ code you first need to create a UnrealScript class that you declare as native. This tutorial assumes that you already know how to compile UnrealScript code with ucc. If you don't, then the download for the Republic Commando UCC contains a brief explanation in its readme.
For the sake of this tutorial I'm going create a really simple and quite useless class that has only one native function which writes a string to the log file.
class TestNativeClass extends Actor native
                                    placeable;

var int TestInt;

native final function TestNativeFunc(string param);

function PostBeginPlay(){
	Super.PostBeginPlay();

	TestNativeFunc("Hello World!");
	Log(TestInt); //Printing out TestInt which has been modified in C++ code
}
The class is going to be implemented in C++ and thus must be declared as 'native'. I added an integer variable called 'TestInt' that we're going to modify in C++ and then print from UnrealScript just to show that both, the C++ and Unrealscript classes refer to the exact same object in memory.
Furthermore, I declared a native function called 'TestNativeFunc' that takes in a string parameter. I also declared it as final since I don't want it to be overridden by a subclass but you don't have to do this. In my 'PostBeginPlay' function I simply call the native function with "Hello World!" as the string parameter and I also write 'TestInt' which at this point has been changed in C++ code to the log file.
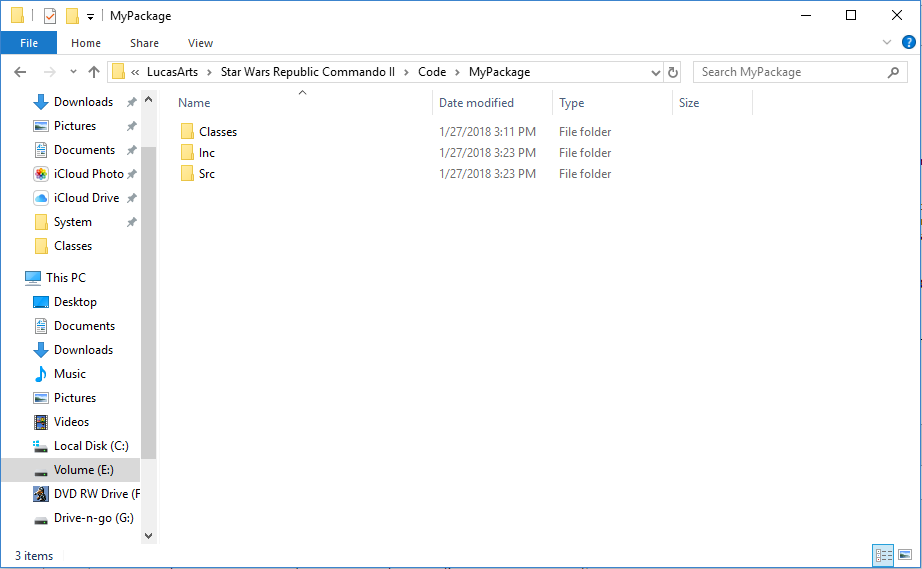
When compiling a native class the ucc also generates a header and a source file with the C++ class definition and some other setup code. But these won't be created by default because the folder they're supposed to be created in doesn't exist so we'll have to do that before we compile our class. In the folder that contains the UnrealScript source code you have a folder with the name of your package which in turn contains a folder called 'Classes' that holds all the .uc files for this package. Navigate to your package's folder and create two new folders called 'Inc' and 'Src' in the same folder as 'Classes'.
Now compile your package with ucc make. When the compilation is successful the ucc will prompt you whether you want to overwrite the files "MyPackageClasses.h" and "MyPackageClasses.cpp". Just enter yes for both. They are created in the 'Inc' and 'Src' folders respectively.
Setting Up Visual Studio .NET 2003
In order to write native code for Republic Commando you first need MS Visual Studio 2003. While it is possible to user a newer version of Visual Studio, it is not recommended due to C++ not having a standardized ABI. This means that there is no guarantee for binary compatibility between modules compiled with different compilers or even different versions of the same compiler. Compilation will work fine on newer compilers but there will most likely be random crashes at startup. Also mixing different versions of the MSVC++ runtime libraries will only lead to more problems.
VS .NET 2003 is rather old and thus, it has some issues with newer versions of Windows but there are workarounds. You can ignore any errors that might occur during the installation as it should work regardless. You can also use a newer better editor and only use VS to compile everything from the command line.
Once you have installed Visual Studio open it up and download or clone this solution that is going to contain all your native coding projects: Github. This repository always contains the most up-to-date version of the headers. Place the content of the 'CT' folder in the Code folder you just created. Open the solution up in visual studio and you will see that it already contains three native coding projects that you can use as an example. You can use these projects and add your code there but you probably want to create a new project with a different name. In order to do that go to the explorer on the left, right-click the solution ('CT') and go to "Add->New Project...". Create an "Empty Project (.NET)" with the same name as your UnrealScript package. We are actually not going to use .NET but most of the other project default configurations don't work because the buttons in the Wizard are broken on modern Windows for some reason. When you have successfully created a new project you have to adjust some settings. Right click the project (not the Solution!) in the solution explorer and select Properties".
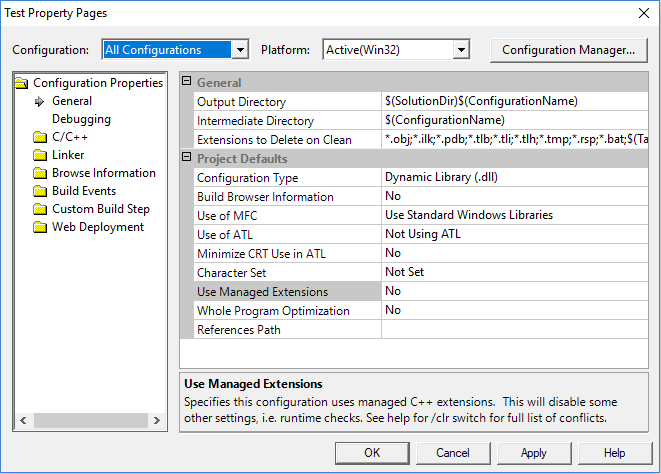
You should see the following:
Change the following properties:
General:
	OutputDirectory = $(SolutionDir)/../GameData/System
	Configuration Type = Dynamic Library (.dll)
	Use Managed Extensions = No
	Character Set = Not Set
C/C++:
	Code Generation:
		Runtime Library = Multi-threaded DLL (/MD)
		Struct Member Alignment = 4 Bytes (/Zp4)
	Advanced:
		Calling Convention = __fastcall (/Gr)
Linker:
	Advanced:
		ImportLibrary =  $(ProjectDir)/lib/$(TargetName).lib

