If you want to help us maintaining this wiki, check out our discord server: https://discord.gg/3u69jMa
Difference between revisions of "Actors Overview"
| Line 4: | Line 4: | ||
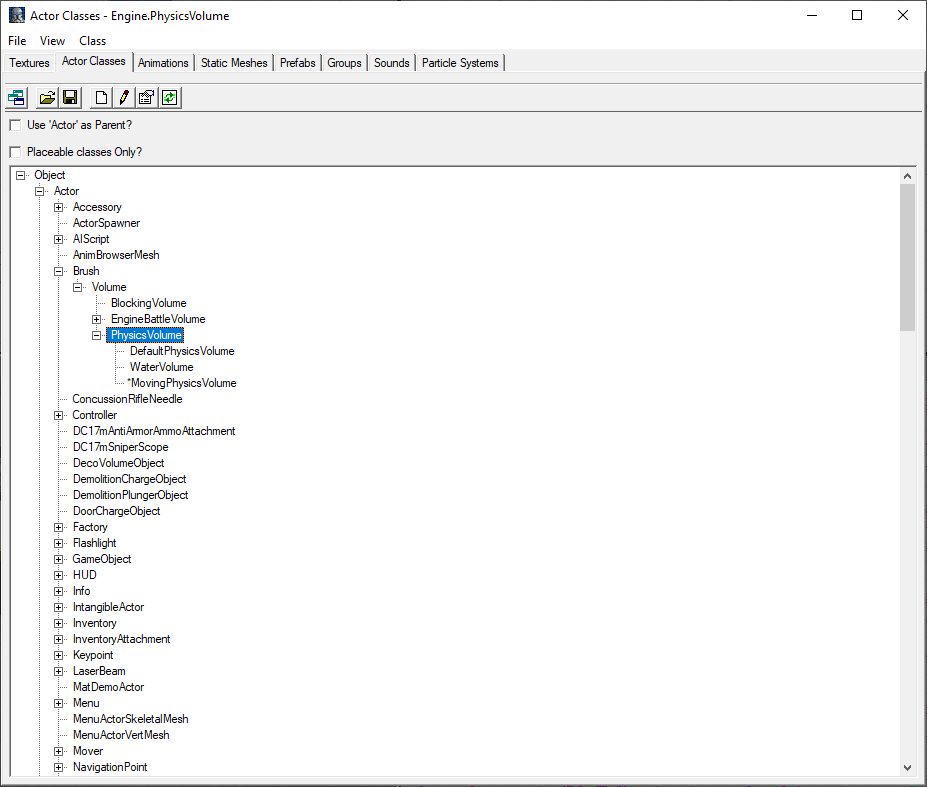
You should now see the window below. Note that I've unticked "Use 'Actor' as Parent?" and "Placeable Classes Only?" which will display all classes in the game. | You should now see the window below. Note that I've unticked "Use 'Actor' as Parent?" and "Placeable Classes Only?" which will display all classes in the game. | ||
[[File:Kg1JPlJ.png | [[File:Kg1JPlJ.png|alt=A view of the Actor Class Browser|A view of the Actor Class Browser]] | ||
As far as map making goes, you should never need to modify classes that are above "Actor", so feel free to leave the relevant checkbox ticked to restrict your view. | As far as map making goes, you should never need to modify classes that are above "Actor", so feel free to leave the relevant checkbox ticked to restrict your view. | ||
Revision as of 13:47, 24 September 2023
Introduction
Open the Actor Class Browser, the button to do so is found in the tools bar along the top of the editor, as shown in the following picture.

You should now see the window below. Note that I've unticked "Use 'Actor' as Parent?" and "Placeable Classes Only?" which will display all classes in the game.

As far as map making goes, you should never need to modify classes that are above "Actor", so feel free to leave the relevant checkbox ticked to restrict your view. You're also unlikely to need to work with actors that cannot be placed, so go ahead and tick that box as well.
As you may already know, selecting an actor such as DC17mSniperPickupMP in the ACB will allow you to then place it into the map through the right click context menu.
If you are familiar with Object Oriented Programming then you will be familiar with the class structure hierarchy. The purpose of this hierarchy is that child classes inherit all the functionality and all the properties of their parent class. In this case Actor is the first class to have a Location (X, Y, Z) and so it and its children can be placed into a map and exist in the game world, while other classes are more abstract and don't have locations.
This is important to know to understand the properties of different actors you place into your map.
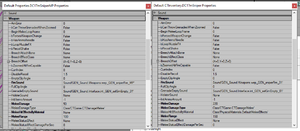
An example is the multiplayer version of the DC17m Sniper; if you open the properties for Actor/Inventory/Weapon/DC17mSniper and Actor/Inventory/Weapon/DC17mSniper/DC17mSniperMP and open the Weapon tab you'll see that the MP version has reduce melee range (100 units down from 150), along with other important value changes.
Note that all values of a child default to the same as the parent values, and the values that have been changed will have their name highlighted in bold text.

It should be warned that you should not modify the properties of these classes when you're making a map. Because these classes are stored in the game files and if you save any changes you'll overwrite your own game files which makes your version of the game incompatible for multiplayer.
Thus, if you wish to change the values of a class you have two options. First, you could place the actor into your map, and then change its values. For example, you can place pickups into the map and modify their respawn time. Second, you could create your own child class and modify its values and place it into the map.
Creating New Classes
Creating your own classes is a very powerful tool in map making, and an essential one to fully achieve your vision. Two examples of custom classes used in map making include making jump pads (which requires writing a few lines of code as well), and custom particle effects.
There are two ways to use the editor to create new classes (if you're programming the classes, then I recommend you use Republic_Commando_UCC). First you need to choose a suitable parent class, i.e. if you want to modify the sniper pickup you'd choose DC17mSniperPickupMP, however this isn't always straight forward. If you want to create a more abstract class for programming, take a look at the Info class and its children. Also keep in mind that your class will inherit all the functionality of its parent. So if you use Trigger as your parent then your new class will be able to behave like a trigger and raise events when a player collides with it, without you having to write any code.
- The first way is to right-click your chosen parent class and choose "New". As with textures and other assets if you use myLevel as the package then your new class will be embedded into the map file. The downside of this method is that the class you create cannot be programmed, so all you can do with it is change its properties. This way is useful for particle effects.
- The second way is to place the chosen parent into your map and then right-click it and choose "Level Interactivity Tools"->"Create Base Class Using Selected". Creating the class this way will allow you to modify the code associated with the class, allowing you to add new functionality to it. Same as the first way, you can use myLevel as the package to embed the new class into the map file.