Check out our discord at https://discord.gg/3u69jMa
Create new Squad Member
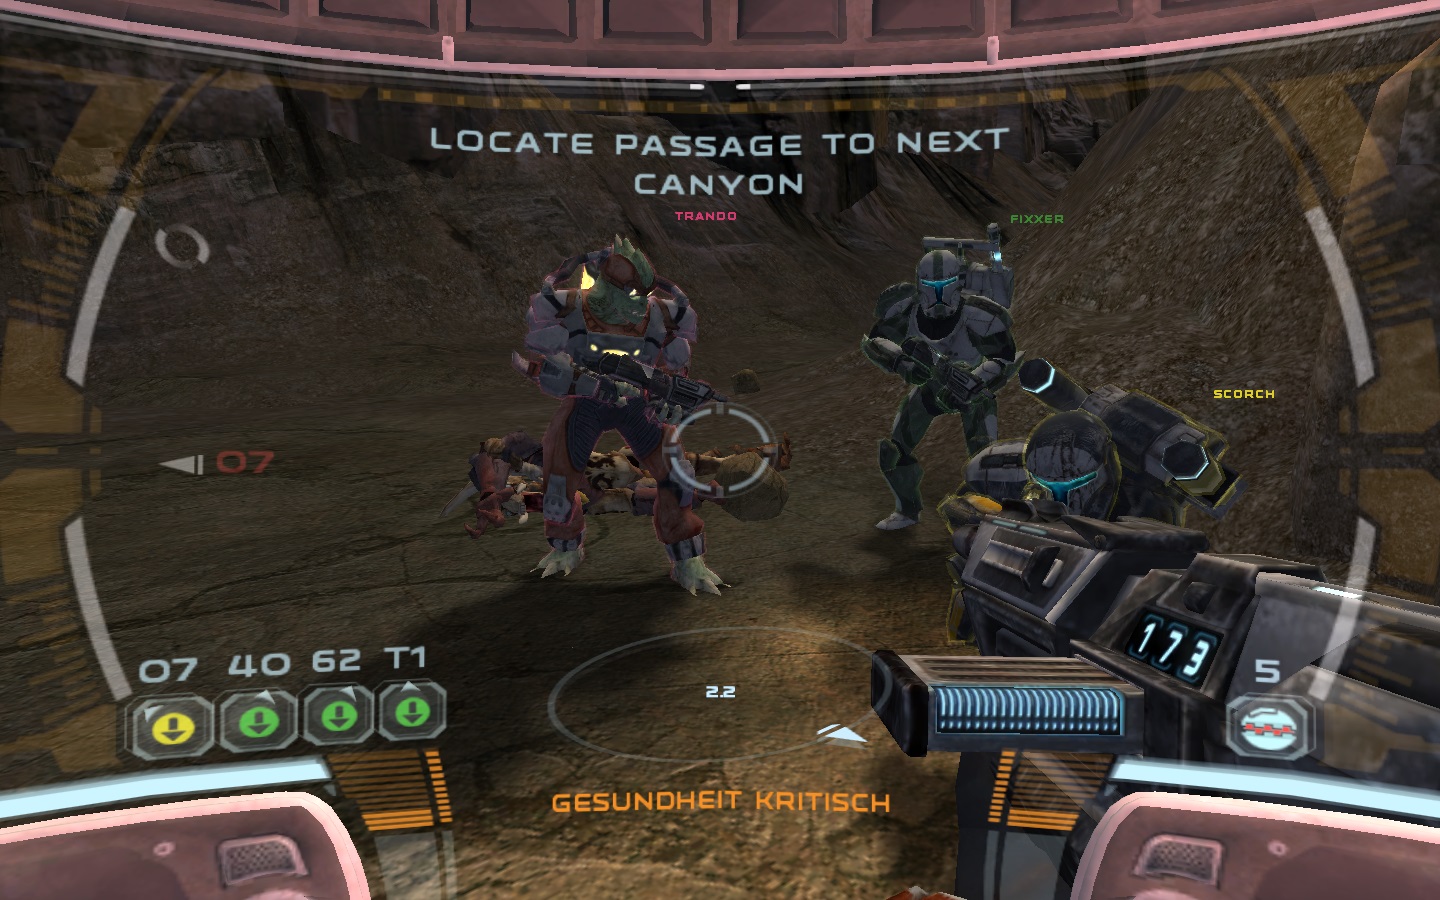
This tutorial shows you how to create custom squad members for your party.
Create new squad class
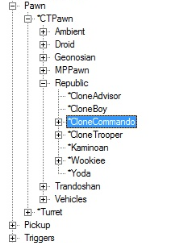
In your Actor browser, go to Actor->Pawn->CTPawn->Republic->CloneCommando and create a new sub class from CloneCommando.
Once the class and package have been created and saved, add the following code to the new class:
class MyCustomCommando extends CloneCommando;

var Texture ReviveOutsideTexture;
var Texture ReviveInsideTexture;

var localized string HUDDescription;
var localized string HUDNickname;

simulated event String GetHudDescription()
{
	return HUDDescription;
}

simulated event String GetHudNickname()
{
	return HUDNickname;
}

simulated function AnimateWoundedWalking()
{
	TurnLeftAnim = \'WoundedTurnLeft\';
	TurnRightAnim = \'WoundedTurnRight\';
	MovementAnim = \'Wounded62WalkForward\';
}

simulated function AnimateWoundedRunning()
{
	TurnLeftAnim = \'WoundedTurnLeft\';
	TurnRightAnim = \'WoundedTurnRight\';
	MovementAnim = \'Wounded62RunForward\';
}
Hit the compile button and save the package.
Adjusting Properties
The rest of this tutorial is just adjusting the properties of our new squad class.
=Advanced=',_binary 'utf-8'),(494,_binary 'This tutorial shows you how to create custom squad members for your party.
Create new squad class
In your Actor browser, go to Actor->Pawn->CTPawn->Republic->CloneCommando and create a new sub class from CloneCommando.
Once the class and package have been created and saved, add the following code to the new class:
class MyCustomCommando extends CloneCommando;

var Texture ReviveOutsideTexture;
var Texture ReviveInsideTexture;

var localized string HUDDescription;
var localized string HUDNickname;

simulated event String GetHudDescription()
{
	return HUDDescription;
}

simulated event String GetHudNickname()
{
	return HUDNickname;
}

simulated function AnimateWoundedWalking()
{
	TurnLeftAnim = \'WoundedTurnLeft\';
	TurnRightAnim = \'WoundedTurnRight\';
	MovementAnim = \'Wounded62WalkForward\';
}

simulated function AnimateWoundedRunning()
{
	TurnLeftAnim = \'WoundedTurnLeft\';
	TurnRightAnim = \'WoundedTurnRight\';
	MovementAnim = \'Wounded62RunForward\';
}
Hit the compile button and save the package.
Adjusting Properties
The rest of this tutorial is just adjusting the properties of our new squad class.
===Advanced===',_binary 'utf-8'),(495,_binary 'This tutorial shows you how to create custom squad members for your party.
Create new squad class
In your Actor browser, go to Actor->Pawn->CTPawn->Republic->CloneCommando and create a new sub class from CloneCommando.
Once the class and package have been created and saved, add the following code to the new class:
class MyCustomCommando extends CloneCommando;

var Texture ReviveOutsideTexture;
var Texture ReviveInsideTexture;

var localized string HUDDescription;
var localized string HUDNickname;

simulated event String GetHudDescription()
{
	return HUDDescription;
}

simulated event String GetHudNickname()
{
	return HUDNickname;
}

simulated function AnimateWoundedWalking()
{
	TurnLeftAnim = \'WoundedTurnLeft\';
	TurnRightAnim = \'WoundedTurnRight\';
	MovementAnim = \'Wounded62WalkForward\';
}

simulated function AnimateWoundedRunning()
{
	TurnLeftAnim = \'WoundedTurnLeft\';
	TurnRightAnim = \'WoundedTurnRight\';
	MovementAnim = \'Wounded62RunForward\';
}
Hit the compile button and save the package.
Adjusting Properties
The rest of this tutorial is just adjusting the properties of our new squad class. Open up the properties window and do the following:
Advanced
bCanBeAutoAimed = False
MyDamageVariance = DV_OrganicCTSquadMember
===AI===',_binary 'utf-8'),(496,_binary 'This tutorial shows you how to create custom squad members for your party.
Create new squad class
In your Actor browser, go to Actor->Pawn->CTPawn->Republic->CloneCommando and create a new sub class from CloneCommando.
Once the class and package have been created and saved, add the following code to the new class:
class MyCustomCommando extends CloneCommando;

var Texture ReviveOutsideTexture;
var Texture ReviveInsideTexture;

var localized string HUDDescription;
var localized string HUDNickname;

simulated event String GetHudDescription()
{
	return HUDDescription;
}

simulated event String GetHudNickname()
{
	return HUDNickname;
}

simulated function AnimateWoundedWalking()
{
	TurnLeftAnim = \'WoundedTurnLeft\';
	TurnRightAnim = \'WoundedTurnRight\';
	MovementAnim = \'Wounded62WalkForward\';
}

simulated function AnimateWoundedRunning()
{
	TurnLeftAnim = \'WoundedTurnLeft\';
	TurnRightAnim = \'WoundedTurnRight\';
	MovementAnim = \'Wounded62RunForward\';
}
Hit the compile button and save the package.
Adjusting Properties
The rest of this tutorial is just adjusting the properties of our new squad class. Open up the properties window adjust the values. Of course most of the values can be changed to achieve certain desires:
Advanced
bCanBeAutoAimed = False
MyDamageVariance = DV_OrganicCTSquadMember
AI
Accuracy = 0.9
bCanBeSquadMember = True                                | Must be true
bOnPathFailNoCollision = True                           | Must be true
SightRadius = 5000
CTPawn
FootStepInfoClass = CloneCommando_FS
IdleInfoClassName = Properties.StandardIdleInfo
Display
EnhancedVisionColor = X                                 | Outline color
EnhancedVisionFade = True                               | Draw color outlines of the character
Skins = X                                               | Path to the texture file of your mesh
DisplayAdvanced
Mesh = X | Link the class to Skeletalmesh
Karma
(Just copy karma properties from default class)
Pawn
AvailableAccessories = X                                | Add your accessories
DropGrenadePercentage = 0
MaxAccessories = 3
MaxHealth = 400                                         | Set max health
MaxShields = 50                                         | Set max shields
MeshSet = X Set = X                                     | Mesh and Animation link
RequiredEquipment = X                                   | Weapon loadout
ShieldColor = X                                         | Color of the shields when taking damage
ShieldRechargeDelay = 4
ShieldRechargeRate = 15
===[Hiden]===',_binary 'utf-8'),(497,,_binary 'utf-8'),(498,,_binary 'utf-8'),(499,_binary 'This tutorial shows you how to create custom squad members for your party.
Create new squad class
In your Actor browser, go to Actor->Pawn->CTPawn->Republic->CloneCommando and create a new sub class from CloneCommando.
Once the class and package have been created and saved, add the following code to the new class:
class MyCustomCommando extends CloneCommando;

var Texture ReviveOutsideTexture;
var Texture ReviveInsideTexture;

var localized string HUDDescription;
var localized string HUDNickname;

simulated event String GetHudDescription()
{
	return HUDDescription;
}

simulated event String GetHudNickname()
{
	return HUDNickname;
}

simulated function AnimateWoundedWalking()
{
	TurnLeftAnim = \'WoundedTurnLeft\';
	TurnRightAnim = \'WoundedTurnRight\';
	MovementAnim = \'Wounded62WalkForward\';
}

simulated function AnimateWoundedRunning()
{
	TurnLeftAnim = \'WoundedTurnLeft\';
	TurnRightAnim = \'WoundedTurnRight\';
	MovementAnim = \'Wounded62RunForward\';
}
Hit the compile button and save the package.
Adjusting Properties
The rest of this tutorial is just adjusting the properties of our new squad class. Open up the properties window adjust the values. Of course most of the values can be changed to achieve certain desires:
Advanced
bCanBeAutoAimed = False                                 | Leftover from the XBOX version, should still be set to False
MyDamageVariance = DV_OrganicCTSquadMember              | Damage class, can be organic/metal or other predefined classes
AI
Accuracy = 0.9                                          | Shooting accuracy
bCanBeSquadMember = True                                | Must be true
bOnPathFailNoCollision = True                           | Must be true
SightRadius = 5000                                      | Distance in ingame units to be in line of sight
CTPawn
FootStepInfoClass = CloneCommando_FS                    | Which footsteps should be used for this mate
IdleInfoClassName = Properties.StandardIdleInfo         | Some standart properties crap
Display
EnhancedVisionColor = X                                 | Outline color
EnhancedVisionFade = True                               | Draw color outlines of the character
Skins = X                                               | Path to the texture file of your mesh
DisplayAdvanced
Mesh = X | Link the class to Skeletalmesh
Karma
(Just copy karma properties from default class)
Pawn
AvailableAccessories = X                                | Add your accessories
MaxAccessories = 3                                      | Define max accessories for this pawn
MaxHealth = 400                                         | Set max health
MaxShields = 50                                         | Set max shields
MeshSet = X Set = X                                     | Mesh and Animation link
RequiredEquipment = X                                   | Weapon loadout
ShieldColor = X                                         | Color of the shields when taking damage
ShieldRechargeDelay = 4                                 | Time in seconds before shield recharging starts
ShieldRechargeRate = 15                                 | How percent to recharge each second
[Hiden]
AudioTable = X                                          | Link specific audio table to the pawn
bCannotDie = True                                       | Must be true since squad members don\'t really die
ControllerClass = X                                     | Select a controller class for this bot
HUDDescription = X                                      | HUD text on bottom left side of screen. Should be between 1 and 2 letters or numbers
HUDNickname = X                                         | Actual nickname which will be displayed above the pawns head like Fixxer, Sev, Scorch
SquadHUDSlot = X                                        | From 4 onwards since 1, 2 and 3 are already occupied by default
Once you adjusted the properties, save the package.
Prevent crashing
In order to use manouvers on the new squad member, you have to link the mesh sets to the animations of the gamemode.
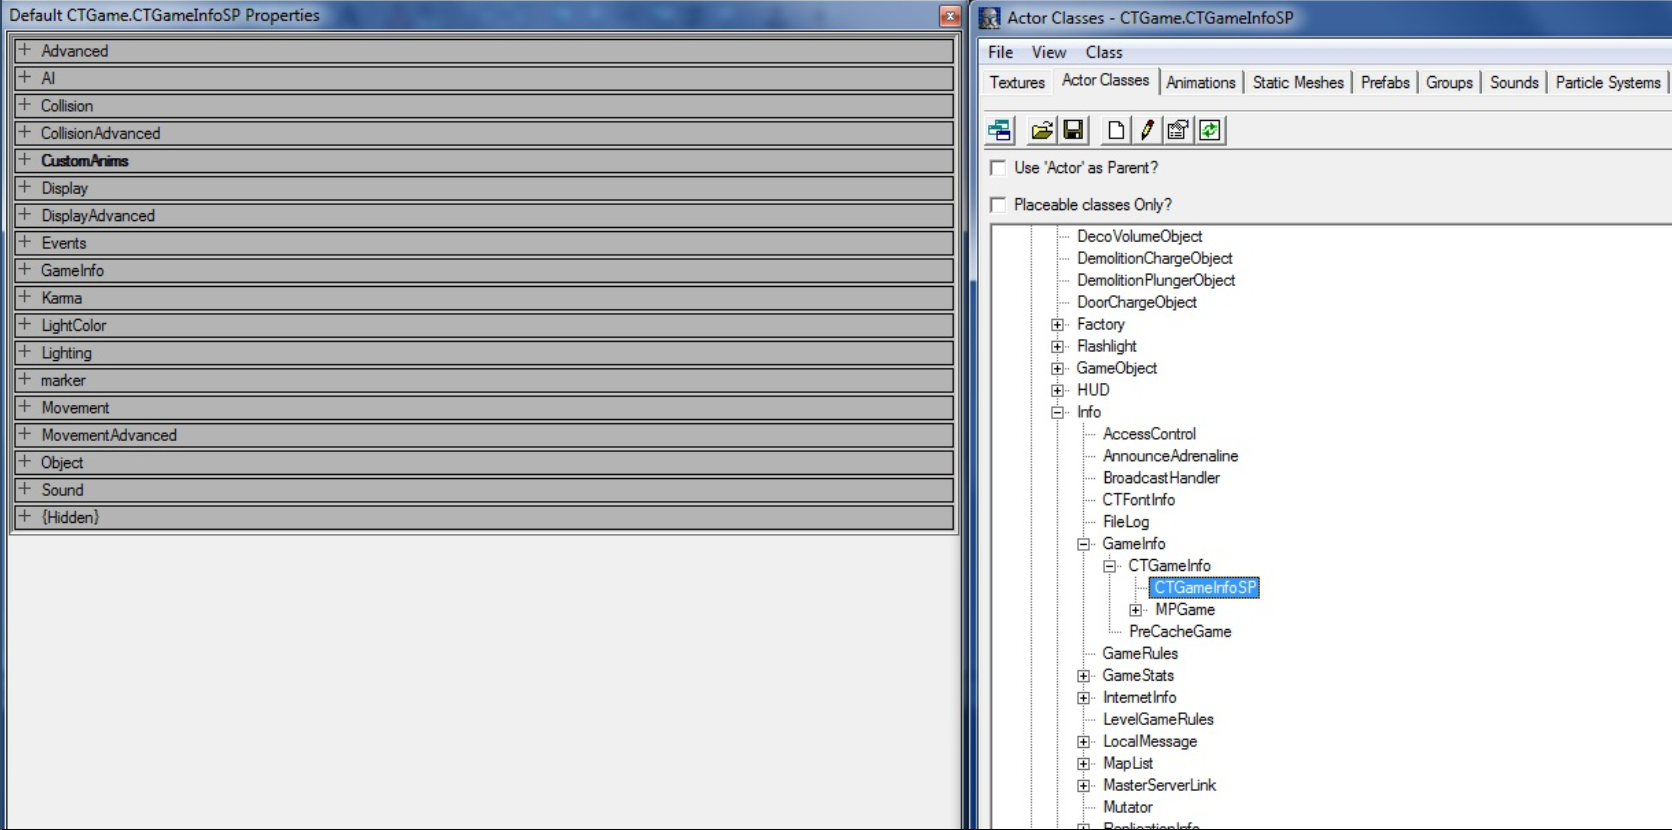
So go to Actor->Info->GameInfo->CTGameInfo->CTGameInfoSP and open up properties window:
On the category "CustomAnims" -> "CustomMeshSets", add your mesh and the default manouver animations.
In this exmaple I used the Trando mercenary mesh:
Mesh: SkeletalMesh\'Clone.TrandoshanMerc\'
Set: MeshAnimation\'Clone.mDemolitionSet\'
MeshAnimation\'Clone.mDemolitionSet\'
MeshAnimation\'Clone.mDoorBreachSet\'
MeshAnimation\'Clone.mHackUnlockConSet\'
MeshAnimation\'Clone.mHackUnlockDoorSet\'
MeshAnimation\'Clone.mProximityMineSet\'
MeshAnimation\'Clone.mTrapSet\'
When done editing, close the editor and a prompt will show up asking to save modified package "CTGame". Click Yes and save it in System folder.
Conclussion
Now the only thing you have to do is add your custom squad member to your map by either placing him or spawning him with scripted Triggers.
In general you can use any mesh (Battledroids/Droidekas/so on) but keep in mind the default manouver animations are not made for those bone stuctures.
Meshes like Clontrooper and Trando mercenary work fine while others will just deform the mesh.
 ',_binary 'utf-8'),(500,_binary 'This tutorial shows you how to create custom squad members for your party.
Create new squad class
In your Actor browser, go to Actor->Pawn->CTPawn->Republic->CloneCommando and create a new sub class from CloneCommando.
Once the class and package have been created and saved, add the following code to the new class:
class MyCustomCommando extends CloneCommando;

var Texture ReviveOutsideTexture;
var Texture ReviveInsideTexture;

var localized string HUDDescription;
var localized string HUDNickname;

simulated event String GetHudDescription()
{
	return HUDDescription;
}

simulated event String GetHudNickname()
{
	return HUDNickname;
}

simulated function AnimateWoundedWalking()
{
	TurnLeftAnim = \'WoundedTurnLeft\';
	TurnRightAnim = \'WoundedTurnRight\';
	MovementAnim = \'Wounded62WalkForward\';
}

simulated function AnimateWoundedRunning()
{
	TurnLeftAnim = \'WoundedTurnLeft\';
	TurnRightAnim = \'WoundedTurnRight\';
	MovementAnim = \'Wounded62RunForward\';
}
Hit the compile button and save the package.
Adjusting Properties
The rest of this tutorial is just adjusting the properties of our new squad class. Open up the properties window adjust the values. Of course most of the values can be changed to achieve certain desires:
Advanced
bCanBeAutoAimed = False                                 | Leftover from the XBOX version, should still be set to False
MyDamageVariance = DV_OrganicCTSquadMember              | Damage class, can be organic/metal or other predefined classes
AI
Accuracy = 0.9                                          | Shooting accuracy
bCanBeSquadMember = True                                | Must be true
bOnPathFailNoCollision = True                           | Must be true
SightRadius = 5000                                      | Distance in ingame units to be in line of sight
CTPawn
FootStepInfoClass = CloneCommando_FS                    | Which footsteps should be used for this mate
IdleInfoClassName = Properties.StandardIdleInfo         | Some standart properties crap
Display
EnhancedVisionColor = X                                 | Outline color
EnhancedVisionFade = True                               | Draw color outlines of the character
Skins = X                                               | Path to the texture file of your mesh
DisplayAdvanced
Mesh = X | Link the class to Skeletalmesh
Karma
(Just copy karma properties from default class)
Pawn
AvailableAccessories = X                                | Add your accessories
MaxAccessories = 3                                      | Define max accessories for this pawn
MaxHealth = 400                                         | Set max health
MaxShields = 50                                         | Set max shields
MeshSet = X Set = X                                     | Mesh and Animation link
RequiredEquipment = X                                   | Weapon loadout
ShieldColor = X                                         | Color of the shields when taking damage
ShieldRechargeDelay = 4                                 | Time in seconds before shield recharging starts
ShieldRechargeRate = 15                                 | How percent to recharge each second
[Hiden]
AudioTable = X                                          | Link specific audio table to the pawn
bCannotDie = True                                       | Must be true since squad members don\'t really die
ControllerClass = X                                     | Select a controller class for this bot
HUDDescription = X                                      | HUD text on bottom left side of screen. Should be between 1 and 2 letters or numbers
HUDNickname = X                                         | Actual nickname which will be displayed above the pawns head like Fixxer, Sev, Scorch
SquadHUDSlot = X                                        | From 4 onwards since 1, 2 and 3 are already occupied by default
Once you adjusted the properties, save the package.
Prevent crashing
In order to use manouvers on the new squad member, you have to link the mesh sets to the animations of the gamemode.
So go to Actor->Info->GameInfo->CTGameInfo->CTGameInfoSP and open up properties window:
On the category "CustomAnims" -> "CustomMeshSets", add your mesh and the default manouver animations.
In this exmaple I used the Trando mercenary mesh:
Mesh: SkeletalMesh\'Clone.TrandoshanMerc\'
Set: MeshAnimation\'Clone.mDemolitionSet\'
MeshAnimation\'Clone.mDemolitionSet\'
MeshAnimation\'Clone.mDoorBreachSet\'
MeshAnimation\'Clone.mHackUnlockConSet\'
MeshAnimation\'Clone.mHackUnlockDoorSet\'
MeshAnimation\'Clone.mProximityMineSet\'
MeshAnimation\'Clone.mTrapSet\'
When done editing, close the editor and a prompt will show up asking to save modified package "CTGame". Click Yes and save it in System folder.
Conclussion
Now the only thing you have to do is add your custom squad member to your map by either placing him or spawning him with scripted Triggers.
In general you can use any mesh (Battledroids/Droidekas/so on) but keep in mind the default manouver animations are not made for those bone stuctures.
Meshes like Clonetrooper and Trando mercenary work fine while others will just deform the actual mesh.

